
A metal roof goes together like a stack of dependencies. Each layer relies on the one beneath it being right, which is why metal roof installation is really a question of order. Get the sequence wrong and you end up unscrewing sheets to slide a flashing under them, or chasing a leak that started with one overtightened screw. Here is the order that works, from the first roll of sarking to the last screw, plus the points where it pays to call in a licensed roofer.
The installation order at a glance
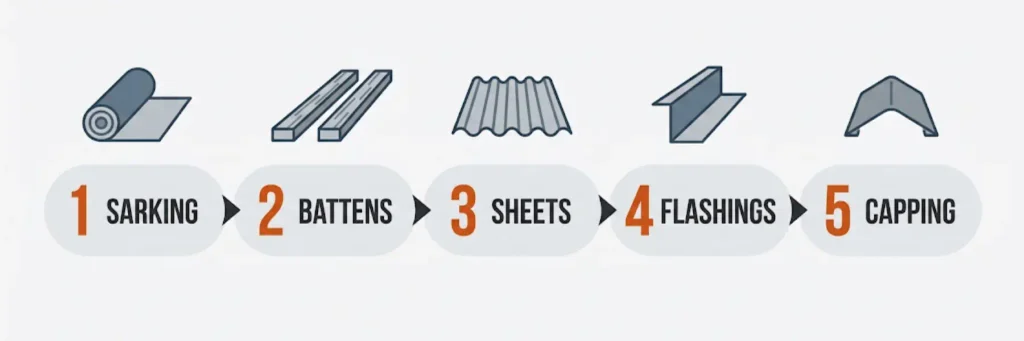
- Sarking (underlay) rolled out over the rafters or trusses
- Battens fixed to the frame, or sheets fixed straight to purlins where the profile and design allow
- Sheets laid and fixed, starting from the correct end of the roof
- Flashings at walls, edges and penetrations
- Capping at the ridge, then a final check of every fixing
Everything below follows that sequence.
Before you start: measuring and ordering
Most on-site headaches start at the ordering stage. Before anything goes on the roof:
- Measure each roof plane separately. Length from eave to ridge, width along the eave. Hips, valleys and skillions each need their own measurements.
- Work out your pitch. It affects which profile suits the roof and how the flashings are shaped. Our guide on how to calculate roof pitch in degrees without guessing walks you through it.
- Order sheets to length. Long cuts on the roof are slow, messy and leave hot swarf on the sheet. Browse the metal roofing range or the Colorbond roofing range, and talk to our team about lengths before you order.
- Order flashings and capping at the same time, in a colour or finish that matches the sheets.
Step 1: Roof sarking goes down first
Sarking is the reflective membrane that sits under the sheets. It catches condensation and any wind-driven water that gets past the roof, and with an air gap beside its foil face it can add to the roof’s thermal performance.
- Roll it out across the rafters or trusses, starting at the eave and working up, so each run overlaps the one below and sheds water downhill
- Keep it taut enough that it doesn’t sag into the gutter line
- Read our explainer on what roof sarking is for the basics, and see our roof insulation range for membrane options
If you are comparing membranes, the Thermoseal Extra Heavy Duty ResiWrap Wall Wrap (1350 mm) is a heavy duty reflective wrap sold primarily for walls. Before choosing any membrane for a roof, check it is rated for your climate zone. Melbourne sits in NCC climate zone 6, where condensation rules are stricter, so confirm suitability on the product data sheet or with our team.
Step 2: Battens set the fixing points
Battens give the sheets something to screw into, so their spacing decides how far your sheets span. That spacing is not a rule of thumb. It comes from the sheet manufacturer’s published span tables, which vary with profile, steel thickness and where the sheet sits on the roof (end spans and internal spans differ).
- Use the span tables for your exact profile, such as those in the Lysaght roofing and walling installation manual
- Keep battens straight and level, because the sheets will show every dip
- For sizes, quantities and fixing, read what roof battens are and how many you need for a metal roof
Step 3: Laying and fixing the sheets
This is where steel roof installation succeeds or fails. A few rules from the Lysaght guides decide whether the roof stays dry:
- Start at the right end. Lysaght’s guidance is to start laying from the end of the building in line with the prevailing weather where possible, so check the lap direction diagram before the first sheet goes down.
- Rest bundles over supports. Place sheet bundles over or close to firm supports, never in the middle of a span.
- Fix through the crests on roofs. Lysaght recommends crest fixing for roofs on profiles including corrugated and Trimdek. Pan or valley fixing is a walling option, not a roofing one.
- Drive screws square. Keep each screw perpendicular to the sheet and centred on the rib or corrugation.
- Snug, not crushed. The sealing washer should be gripped firmly enough to seal. Overtightening can split the washer or dent the sheet, and either one can let water in.
Choosing metal roof screws: the sheets themselves are pierce-fixed with hex head roofing screws fitted with a sealing washer, matched to your batten material (timber or steel). Find them in our screws range. For the smaller fixings around the job, such as brackets, clips and trims into timber, keep these on hand:
- Timber Wafer 10g x 35 C3 (50 pack): a low profile wafer head screw for accessory fixings into timber
- Timber Pan Head 10×38 SS (50 pack): a stainless steel pan head screw for the same kind of timber fixings
The full roof fixing supplies range covers the rest. Sweep away drilling swarf as you go, since metal filings left on the sheet can rust and stain the finish.
Step 4: Flashings at walls, edges and penetrations
Flashings are fitted once the sheets are fixed, and each one must sit over the profile so water runs away from the joint rather than into it.
- Apron flashing seals the junction where the roof meets a wall. On a Trimdek roof, the 150 mm Apron Flashing to suit Trimdek (Colorbond or Zincalume) is shaped to sit down over the ribs.
- Barge capping finishes the gable edge, covering the sheet edge and the barge board.
- Penetrations such as vents and flues need their own flashing detail, sealed to suit the sheet profile.
For a fuller picture of the shapes and where each one goes, read roof flashing types explained for metal, tile and polycarbonate roofs.
Step 5: Ridge capping and the final fix
The ridge goes on last, covering the top ends of the sheets on both sides of the roof.
- Use a capping shaped for your profile, such as the Ridge Capping to suit Trimdek Profile, 220 mm Colorbond
- Fix it through the crests, using the same snug washer rule as the sheets
- Then walk the whole roof (on the fixing lines, where the sheet is supported) and check every screw: missed fixings, overtightened washers and leftover swarf
Safety first: working at height
No roof is worth a fall. Before you install a metal roof yourself, be honest about the risks:
- Work only in dry, calm conditions, as metal sheets are slippery when wet and act like sails in wind
- Set up and secure your ladder properly, and use edge protection or a harness system where the height and pitch call for it
- Never work on a roof alone, and keep well clear of overhead power lines
- Have the right gear for the job; our list of the top 10 tools every metal roofing pro needs is a good checklist
There is also the legal side. In Victoria, roofing (stormwater) is a regulated class of plumbing work, and the Building and Plumbing Commission sets out which classes plumbers must be registered or licensed in (BPC, plumber classes and categories, accessed October 2026). A licensed plumber must issue a compliance certificate where the total value of plumbing work, including materials, exceeds $750 (BPC, plumbing compliance certificates, accessed October 2026). Check the rules in your state before you start.
Frequently asked questions
Do screws go in the crest or the valley on corrugated iron?
On a roof, in the crest. Lysaght recommends crest fixing for corrugated roofing, as it keeps the screw and washer above the water running down the valleys. Valley fixing is an option for walls only.
Can I install Colorbond over my old roof?
Don’t assume you can. Laying new sheets over old ones adds weight to the frame and hides the condition of the battens and sarking underneath. Talk to a licensed roof plumber or building surveyor before planning an overlay.
What batten spacing do I need?
It depends on your sheet profile, steel thickness and where the batten sits on the roof. Use the manufacturer’s published span tables for your exact profile, and see our roof battens guide for quantities.
How many metal roof screws do I need per square metre?
Lysaght specifies fixings per sheet at each support rather than per square metre. Crest-fixed Trimdek, for example, takes four fasteners per sheet per support. Multiply by the number of battens each sheet crosses, and check the guide for your profile.
When should I not DIY a metal roof?
When the roof is high or steep, when the work needs a licensed plumber under your state’s rules, when the frame or battens look damaged, or whenever you’re not confident working at height. In those cases, buy the materials and let a licensed roofer do the install.
Ready to plan your roof? Browse our metal roofing range or call the Truganina team on (03) 9394 1400 with your measurements. We deliver Australia-wide.